|
|
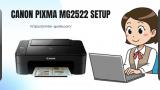
Canon Pixma MG2522 Setup - Connect the Canon Pixma MG2522 to the WIFI
Published by Mar 1st 2023, 5:11pm
Canon Pixma MG2522 welcomes you to low-cost home printing. It is an all-in-one colour inkjet printer that can quickly and accurately scan and copy your documents. The Canon MG2522 is an easy-to-use printer for all of your printing requirements, making it simple to print your pages with XL ink cartridges that need to be changed less frequently. All in all, Canon Pixma Mg2522 Setup prepares you for an affordable home printing setup that is compatible with both Windows and Mac operating systems. The Pixma MG2522 is an All-in-One inkjet printer, scanner, and copier with no screen and just a few keys to assist you connect it to your WiFi network.
How do I Setup my Canon Pixma MG2522 printer?
The Canon Pixma MG2522 printer may be linked to your router and computer in a variety of ways including WiFi and USB. Both Windows and Mac OS, which only support a direct USB connection, are compatible with the Canon Pixma MG2522. Here, we walk you through some quick and simple step-by-step instructions for Canon Pixma Mg2522 Wireless Setup, including instructions for unboxing and configuration.
- Unpacking the MG2522 printer, setting up the options, and inserting the ink cartridges are all part of the initial setup.
- The MG2522 printer must first have its seal examined; if it is not correctly sealed, you must send it back to the manufacturer right away.
- Instead, remove the printer from its packaging and set it down on a level, stable surface for the remainder of the connection, setup, and installation procedures.
- The Canon Pixma MG2520 printer must then be connected to the power source via its power cord, and a functional wall socket must be chosen to plug it in. To begin the Canon Pixma MG2522 Setup procedure, turn on the MG2520 printer by pushing the power button.
- You are then given the option to choose your preferred nation, language, date, and time. Set them up as best you can, then save the settings.
- Pull the access door for the ink cartridges now, and wait until the carriage slot goes to one end. The new Canon Pixma MG2522 ink cartridges should then be opened and placed in the appropriate slots.
- Once the aforementioned setup is complete, you must print a test page on the printer to ensure that it is operating properly.
Setup for the Canon Pixma MG2522 Wireless
- The first step is to attach the Canon Pixma MG2522 printer to the wall outlet. Now, for Canon Pixma MG2522 Setup, use the USB cable to connect one end of it to the printer and the other end to a wall outlet.
- After that, start the Pixma printer. Choose Wireless connect by tapping on it.
- Now, the Canon Pixma MG2522 printer is looking for networks.
- Choose the desired network from the list after it appears, then enter the password to connect.
- In this way, the Canon Pixma MG2522 Setup is finished and the printer is successfully linked to the Wi-Fi network.
If this blog post on how to set up a canon pixma mg2522 printer was helpful to you and prepared you by making the installation of the printer's drivers and effective printing arrangements easier, do not hesitate to pass along the provided information to others who could use it. Try contacting the Canon iJ setup team for assistance if you run into any problems.
Also Read: ij.start.canon Setup
History for matthew paulson
|